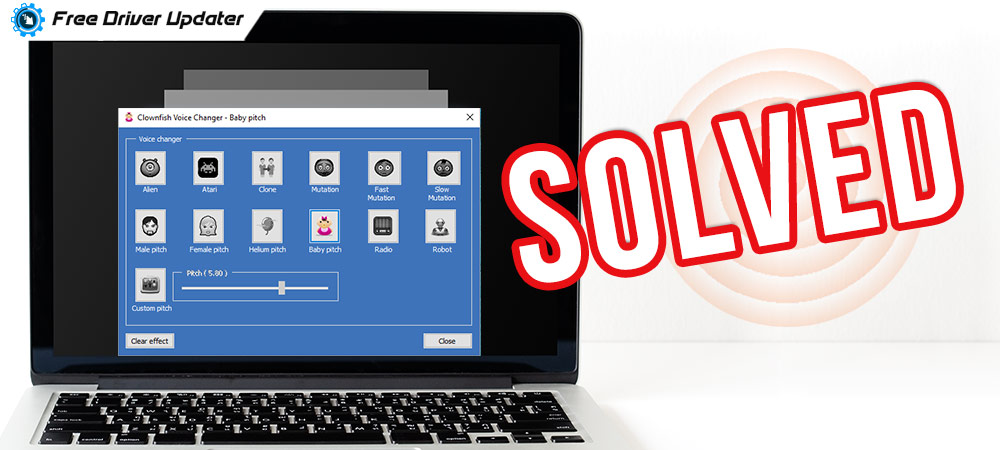
Fix Clownfish voice changer not working issue with the solutions explained in this write-up. Read thoroughly to get an in-depth understanding of it.
If you are an avid gamer and accessed communication channels like Discord or Skype, then Clownfish would be your preferred application for changing the voice. Clownfish voice changer application not only lets you change the voice but also acts as a translator for communicating applications like Skype, Discord, Twitch, and many more. Amongst all the voice translating applications available, Clownfish is one of the well-known voice changer applications across the globe.
Irrespective of being one of the most popular voice changing applications, it still ends in some sort of errors where the app does not work properly. It could be very irritating to experience Clownfish voice changer not working issues. Therefore, we have created this write-up, just to teach you how to fix it easily & quickly.
The Effective Way to Fix Clownfish Voice Changer Not Working
Use Bit Driver Updater to install the latest and most suitable microphone driver to fix the Clownfish voice changer not working problem on Windows 10. It is the most prominent driver updater for resolving all the issues related to the drivers. And, it can also boost the overall performance pace of your PC. Below is the download button to get Bit Driver Updater for Free.
Quick Solutions to Fix Clownfish Voice Changer Not Working Issue
However, we have explained different solutions below to fix Clownfish voice changer not working issue. You do not need to try all of them, just read until you get your perfect bet. So, without further ado, let’s read all of them one-by-one.
Solution 1: Check the Version of Skype, Discord, and other Apps
Firstly, you need to ensure that the version of the applications like Discord, Skype, Twitch, etc, are highly compatible with the version of the Clownfish application. Because if you are running a vice-versa version of corresponding applications then you may encounter Clownfish voice changer not working issue. In addition to this, quite a few users have reported that Clownfish is not compatible with the most recent version of Skype and Discord. Therefore, you need to check the version of Skype and Discord, here are the steps, which you need to follow:
Step 1: Trigger the Skype on your computer.
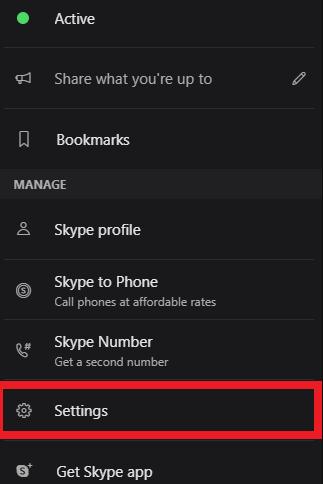
Step 2: Next, make a click on your Skype profile from the left menu pane, and scroll down to select the Settings from the quick access menu list.
Step 3: From the subsequent window, locate and choose the Help & Feedback option in the left pane.
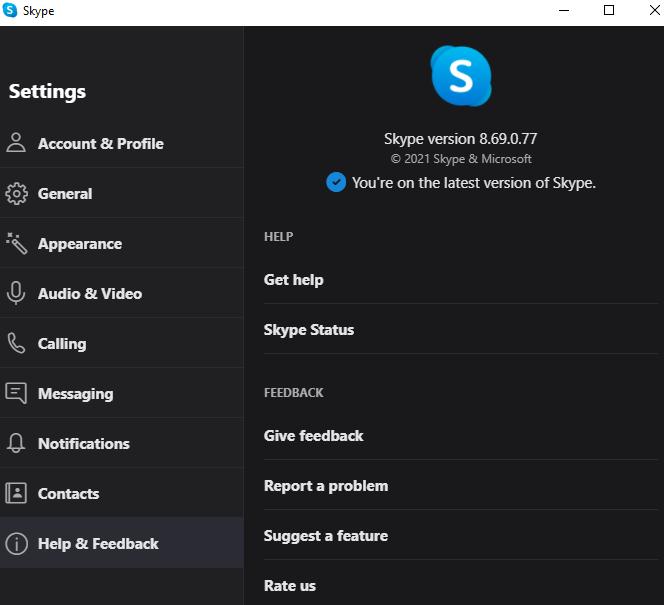
Step 4: At last, under the Skype logo you can notice the version of the respective application.
That’s how you can check Skype’s version. In the case, if your system is of outdated Windows version then, it is advised to use the older version of Skype.
By performing the same steps you can check the version of the Discord application. And, if you see that your Discord version is outdated then update it instantly. Contrarily, if your system’s version is old then, downgrade the Discord’s version to match up the compatibility.
Also Know: How to Update Outdated Drivers on Windows 10, 8, 7
Solution 2: Introduce Microphone in Clownfish
The microphone could not be neglected to fix Clownfish voice changer not working issue. The application needs the microphone to identify the voice of the user and translate it to your system. Hence, the microphone acts as an important attribute in Clownfish isn’t responding issues. Here are the steps you need to follow in order to install the Microphone in Clownfish.
Step 1: Introduce Clownfish to your system.
Step 2: Click right on the Clownfish icon from the taskbar.
Step 3: After this, make a click on the Setup option and then select System Integration from the list of options that appeared.
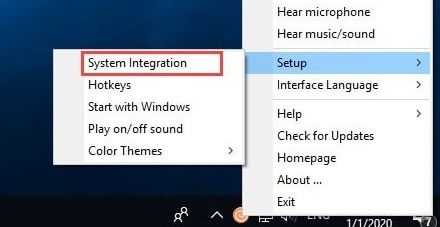
Step 4: Next, pick the Microphone which is performing well, and make a click on the Install option.
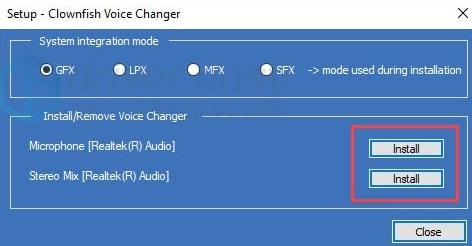
Step 5: At last, restart your system just to check whether the app is now working properly or not.
That is it! Now you have successfully installed the Microphone to Clownfish. After installing the microphone, still you are feeling that Clownfish isn’t performing as it should. Then, move onto the next solution.
Also Know: Completely Best Free Driver Updater Software for Windows 10, 8, 7
Solution 3: Update Microphone Drivers
Furthermore, faulty or outdated microphone drivers may also result in the same error. Another cause of bad functioning of the Clownfish is when the drivers are not installed properly. Therefore, you need to make sure that microphone drivers are always up-to-date with their latest version of drivers.
You can get the latest microphone drivers from the official support & download page of the microphone manufacturer. But, this could be a daunting task because you need to look for the drivers manually. And, at the same time, it requires a proper amount of technical knowledge plus takes a lot of time. So, if you are not fit into all these requirements, then you can use the Bit Driver Updater.
It is one of the best driver updater tools available in the market, which lets you perform the driver updates within a few clicks of the mouse. Furthermore, the driver updater utility comes with a default optimizer, which helps to maximize the performance of the overall system. Just follow the steps to update the microphone drivers via Bit Driver Updater.
Step 1: Get Bit Driver Updater downloaded and installed on your system by clicking on the button below.
Step 2: After the successful installation, launch the utility on your system and make a click on the Scan button from the left pane side.
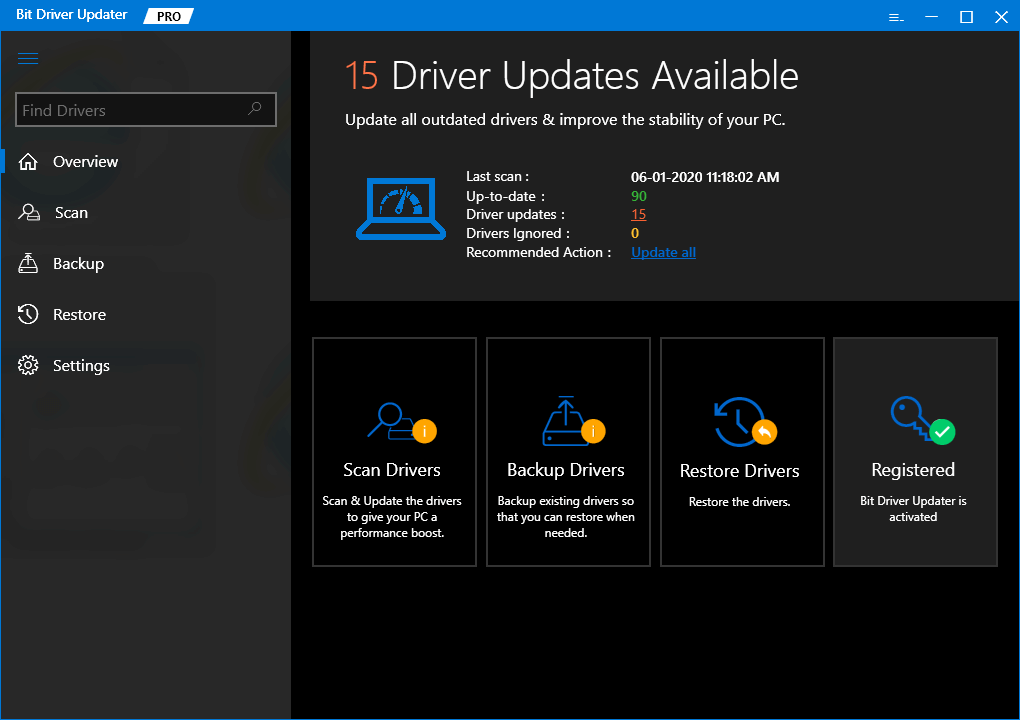
Step 3: It could take a long time, so you need to wait until the utility scans your PC and find out the drivers which need to be updated.
Step 4: After this, check the list of the outdated drivers and find out the Microphone driver.
Step 5: Lastly, click on the Update Now button which is presented next to it.
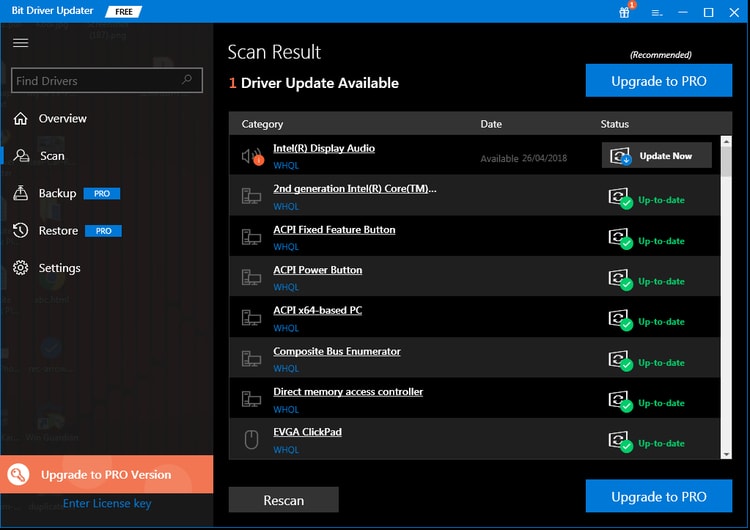
In order to save much time, if you want to update the other drivers as well along with the microphone driver, then luckily you can do so. But, to do so, you need to use the pro version of the Bit Driver Updater. Because the free version of the utility won’t give access to the advanced features. Hence, it is recommended to use the premium version of it. After updating the microphone drivers, the issue Clownfish voice changer not working should be resolved, but in case, it still persists then try another fix.
Also Know: How to Install, Update and Fix Bluetooth Driver in Windows 10
Solution 4: Up-to-date Clownfish Version
Possibly, the outdated version of the Clownfish is causing the Clownfish voice changer not working issue. If it is the case, then you need to update the application to receive the best outcomes of it. Below are the steps to update the Clownfish application:
Step 1: On your keyboard, hit the Windows + R keys at the same time to launch the Run Dialog box on your system.
Step 2: Next, input Control in the box and hit the Enter key from the Keyboard to head to the Control Panel.
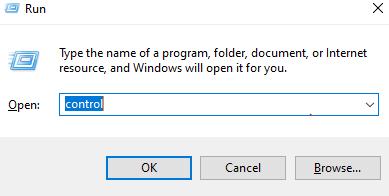
Step 3: Set the View by as Category.
Step 4: Furthermore, under the Program make a click on the Uninstall a Program.
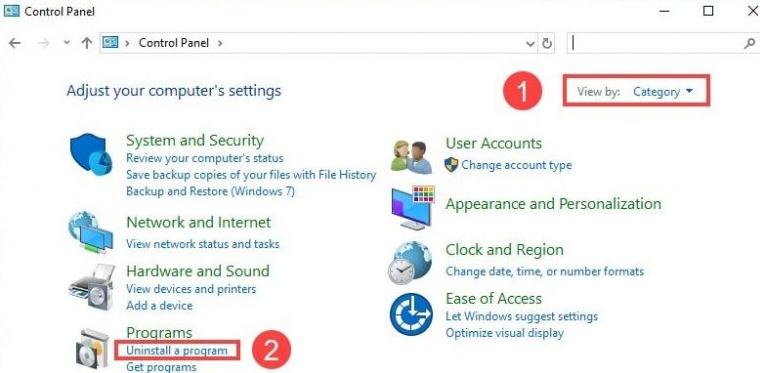
Step 5: Navigate to the Clownfish and click right on it to choose the Uninstall.

Step 6: After this, visit the official website of Clownfish and download the voice changer app.
Step 7: Run its setup file and follow the wizard to get it installed successfully on your system.
Step 8: Start your machine again to save the new changes.
Now, try to access the Clownfish voice changer application and check to see if the issue has disappeared or still persisting. This can also fix the Clownfish music player not working issue.
Solution 5: Install Clownfish in Default Location
After using the upgraded version of the Clownfish, still, if the issue remains the same, then as a final bet you need to make sure that Clownfish is installed in the default location. Here is how to fix Clownfish voice changer not working issue by installing it in a default address.
Step 1: Press Windows and R keys together from the keyboard to trigger the Run Dialog box.
Step 2: Then, input the appwiz.cpl in the box and press the Enter key.
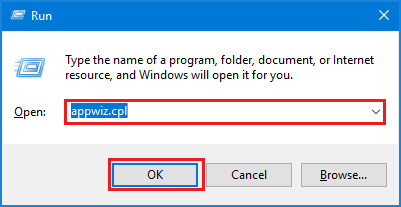
Step 3: Now, look for the Clownfish in the subsequent prompt and click right on it to choose the Uninstall option.
Step 4: After this, install it by using the installer.
Step 5: And, remember to not change the default location address this time when the box prompts.
When you are done with the above steps, restart your system and try to use the Clownfish. Now, your issue should diagnose.
Also Know: USB Device Not Recognized on Windows 10 [Fixed]
Clownfish Voice Changer Not Working – FIXED
We are hoping that one of the explained solutions in this write-up helped you in order to fix Clownfish voice changer not working issue. Your queries are welcomed, so share them with us in the comment box below. We assure you to heal each query in the best way possible.
Lastly, to read more such helpful troubleshooting guides, don’t forget to subscribe to our Newsletter. Till then, stay in touch with us so that you can stay connected with the tech niche.


