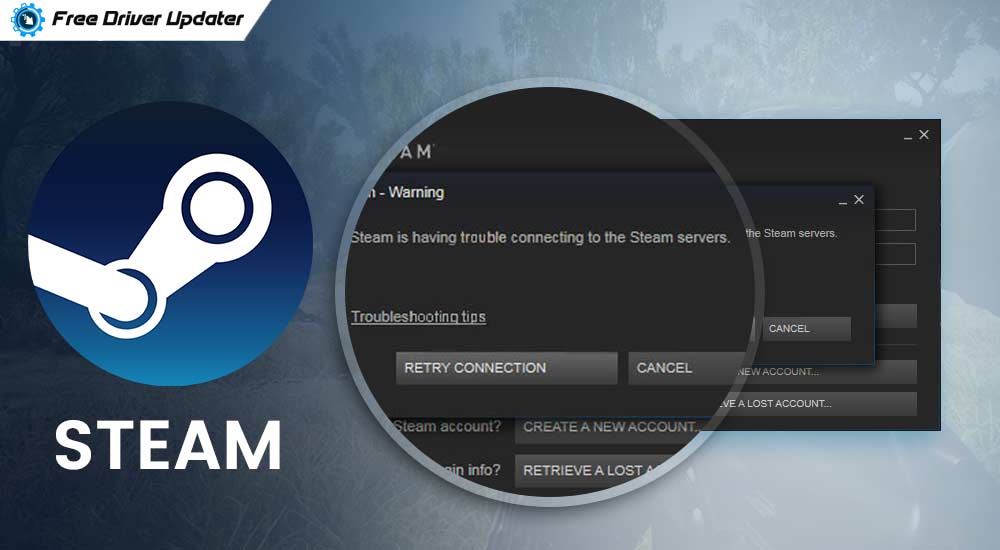
Did you just run into the error of “could not connect to the Steam network?” If so, then here is a detailed article on how to get rid of this error effortlessly.
Steam is an online platform that offers many services such as online gaming, social networking, and video streaming, etc. Steam is sort of a connecting link between online users and gaming services.
However, many times users run into different kinds of technical errors such as “Steam download slow” error and “Steam not connecting” error.
When the could not connect to the Steam network error happens then it could be due to the following reasons:
- Outdated network drivers are one of the primary reasons behind this error.
- Third-party software and antivirus solutions may interfere with the Steam connectivity.
- When the network connection is modified, then it may lead to such an error which will prevent you from accessing your Steam account.
- Incorrect transmission protocols may prevent you from connecting to Steam.
- There might be Admin blockage that could prevent you from connecting to the Steam network.
Here is the Solutions to Fix “Could Not Connect to the Steam Network” Error:
Let us now look at the methods and hacks to resolve Steam not connecting errors. Ensure to restart your system once and see if that helps to troubleshoot a temporary glitch before trying the below fixes.
Solution 1: Restart the Steam Client
You can fix the problem “can’t connect to Steam” by restarting the the Steam connection with the help of the following steps:
- Go to the Steam application menu and select Steam.
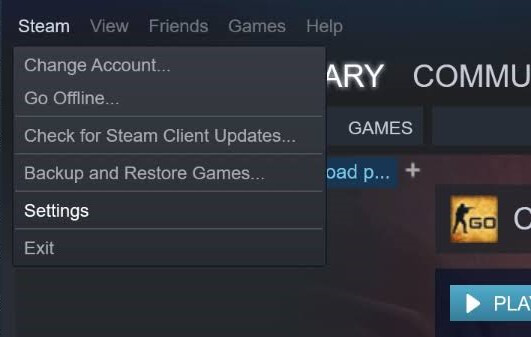
- Select the option of “Go Online.”
- Connect to the Internet and then restart Steam.
Solution 2: Clear Steam Download Cache
Accumulation of cache files in the Steam application can cause Steam not connecting errors. Here is how you can remove the cache:
- Start the Steam client and go to the Settings from the option of ‘Steam.’
- Find the ‘Download’ option and select the “Clear Download Cache” option.

- Then, click “OK.”
- Enter your login details and wait for the process to complete.
- Restart the device and then restart the Steam client.
Open Steam to see if the problem persists or has been completely resolved.
Solution 3: Delete Temp Files
If you are failing to connect to the Steam network, then another potential cause behind it could be your system temp files:
- Open the ‘Temp’ files folder.
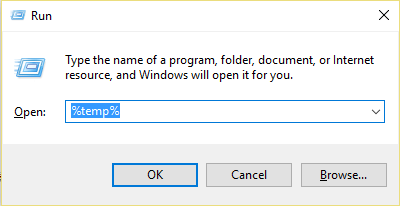
- Choose all the files and delete them.
- Some files might have to be skipped as it might not be possible to delete them.
- Finally restart your system and check if the problem persists.
Also Read: How to Fix Windows Modules Installer Worker High CPU in Windows 10
Solution 4: Update the Steam Client
If your Steam application is not updated then you might run into the “could not connect to the Steam network” error.

Normally applications automatically get updated on their own, however, if it’s somehow not updated then you can manually update it by clicking the option of Steam Client Updates and letting the process get completed.
Solution 5: Change the Steam Internet Protocol Settings
The original Internet protocol for many Steam users is the UDP (User Datagram Protocol). But this protocol may give rise to the Steam not connecting error sometimes.
It is recommended that if you see this error, then you can try and change the Internet protocol to TCP (Transmission Control Protocol) with the help of the following steps:
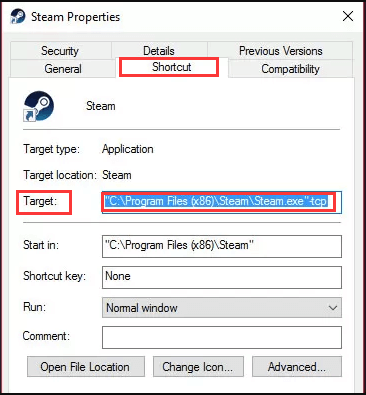
- Right-click on the Steam app on the desktop.
- Select the Properties and when the Properties window opens then go to the tab called Shortcut.
- Add -tcp at the end of the address in the Target dialogue box.
Finally restart the Steam client to see if the problem is fixed for once and all. Otherwise try the subsequent steps.
Solution 6: Check Your Internet Connection
If there is some trouble in your Internet connection, then you can encounter the “could not connect to the Steam network” error. The following steps can help you check the Internet connection using the network adapter:
- Open the Device Manager and expand the Network adapters.
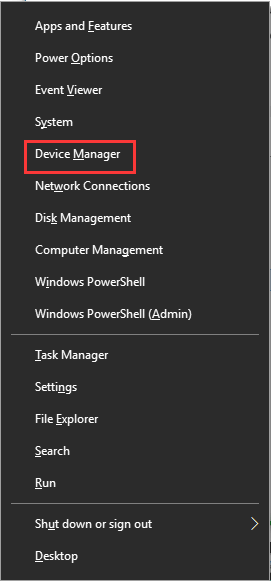
- Go to the list of the WiFi/LAN adapters.
- Double click any specific adapter and choose the Properties from the context menu.
- In the Properties window if you see under the Device status that “this device is working properly,” then you can check all the other adapters one by one.
Another thing that you can do is to revert the changes you have made to your network settings. Here’s how you can do so:
- Open the Command Prompt and enter the following commands followed by pressing Enter after each command:
- ipconfig/release
- ipconfig/all
- ipconfig/flushdns
- ipconfig/renew
- netsh int ip set dns
- netsh winsock reset
Restart your computer and check to see if the problem is resolved or still persists.
Also Know: How To Fix “Origin Won’t Open” On Windows 10 [Solved]
Solution 7: Update the Network Drivers with Bit Driver Updater
You can get Steam not connecting errors if you have outdated network drivers. Updating them can be a tricky and time-taking task for novices. Therefore, a best driver updater tools can be an excellent solution to keep your network drivers updated all the time.
Bit driver updater is a promising application in the category of driver updater tools that can scan your device drivers immediately after installation.
After detecting the faulty or outdated drivers, it can download the official versions of the network drivers that can be installed into the system with the help of one click.
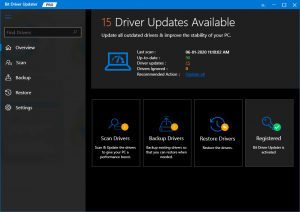
So, after the installation process completes, you can restart the system and log into the Steam client to see if the problem has been fixed.
Solution 8: Turn Off Enhanced Protected Mode
If you are still struggling to get your Steam platform up and running and to fix could not connect to the Steam network error, then you may need to turn off the “enhanced protected mode.”
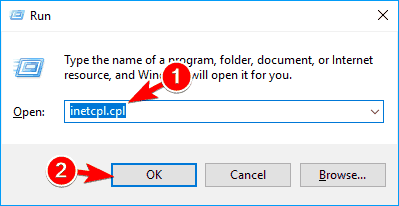
- You can open the Run dialog box and type the command – ‘inetcpl.cpl’ and press Enter key.
- Then as the ‘Internet Properties’ option opens up, under the ‘Advanced’ section open the ‘Security’ section.
- Find the ‘enable enhanced protected mode’ and uncheck the adjacent box.
- Click “Apply” and then “OK” to disable the “enhanced protected mode.”
Solution 9: Reinstall Steam
Ultimately, if all else fails, then you can reinstall the Steam client after deleting all its files.
- Right-click on the Steam app of your desktop and choose “Open file location” to open the root directory.
- Delete files except Steamapps, Userdata, Skins, exe, Ssfn files.
- Then, start the Steam platform from the Steam.exe launcher.
- Steam will automatically download some files and update itself.
Finally, verify if the problem of “could not connect to the Steam network” is resolved or not.
Also Read: How to Fix GeForce Experience “Error Code 0x0003”
Conclusion
This article has thus helped you understand how to fix “Could not connect to the Steam network” error easily. All the hacks are easy to implement and can help you resolve the errors on your own without taking help from professionals. Do leave your valuable suggestions and feedback in the comments section.


