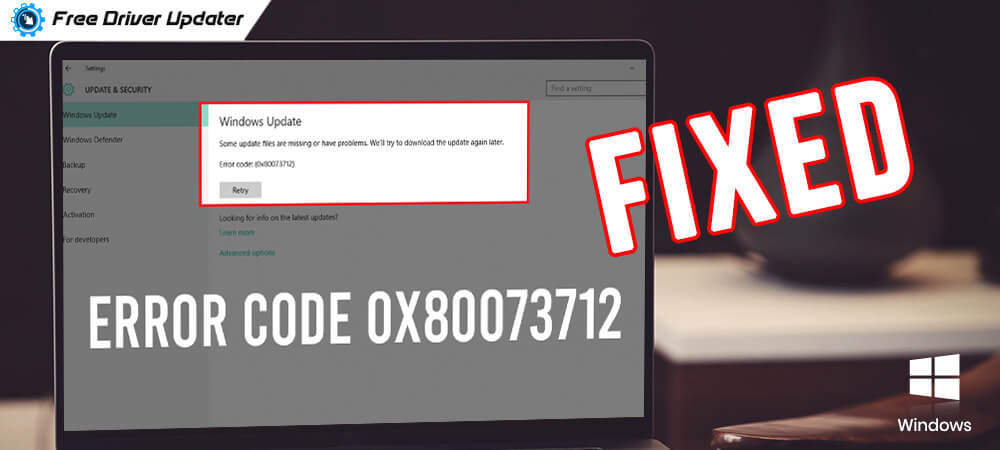
Do you get an error code 0x80073712 amidst Windows Update? If yes, then, don’t worry, try these fixes to resolve this issue easily. Let’s read the entire details below!
While updating the Windows, some files are not installed properly or remain damaged and missing then it results in error code 0x80073712. This error code simply means that Windows Updates rolled into a difficulty. Have you ever encountered this error code during Windows Update? And, still in dilemma how to fix Windows 10 update error code 0x80073712. Then, no need to panic, through this write-up, we’ve brought up a few advanced methods to troubleshoot this issue quite easily. So, without further ado, let’s jump on to our next section that explains the effective solutions to fix this error.
Effective Ways to Fix Error Code 0x80073712 on Windows PC
Way 1: Perform Windows Update Troubleshooter
Windows’ beneficial troubleshooting utility tool i.e., Windows Update Troubleshooter can help us a lot in resolving the Windows Update issues that show error code 0x80073712. Here is how to do it!
Step 1:- Hit the Win key from your Keyboard, and then in the search box input Troubleshoot, then choose the best match of it.
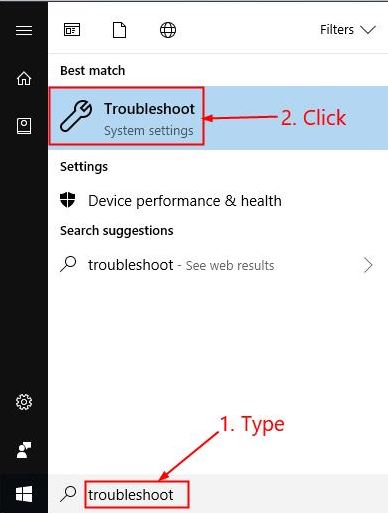
Step 2:- Then, click on the Troubleshoot from the left side of the window.
Step 3:- After this, click on the Windows Update option then, Run the troubleshooter.
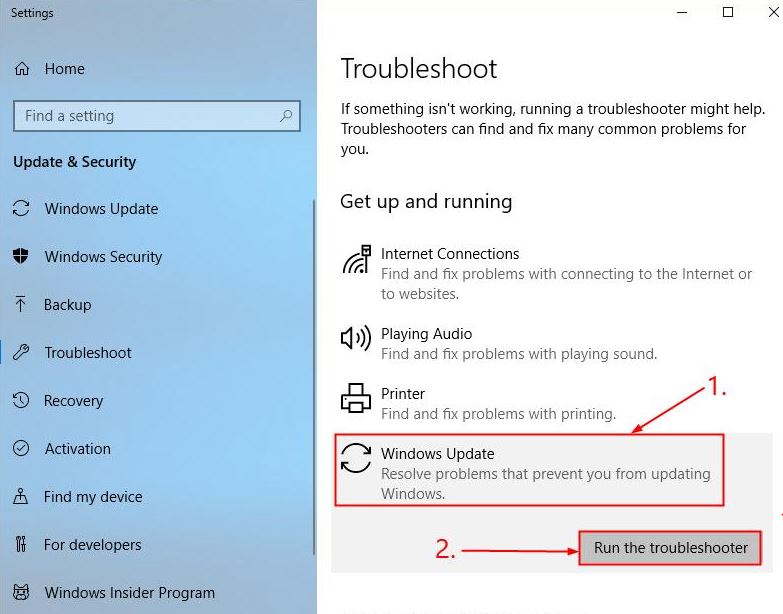
Step 4:- Lastly, follow the on-screen wizard instructions to finish troubleshooting.
Now, start your system again and perform windows update again, expecting this error code 0x80073712 has been solved.
Also Read: Fix Unexpected Store Exception Error on Windows 10
Way 2: Execute SFC Scan
In Windows, SFC, System File Checker, one of the handiest features that helps you to repair the damaged files of your system. Hence, in order to fix the windows update 0x80073712 error code, you can perform an SFC scan to repair those files which are associated with this error. Read the steps below!
Step 1:- Hit the Win key from your Keyboard and input cmd, then right-click on the best match i.e., Command Prompt, and after this click on the Run as Administrator from the menu list.
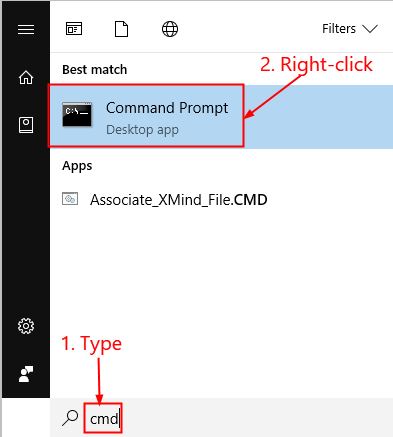
Step 2:- Then, for a confirmation click on Yes.
Step 3:- After that, once the command prompt window will appear then input SFC/scannow and then, hit the Enter key from your Keyboard.

Now, you need to wait for a while until the SFC repair the corrupt or damaged files with the correct ones if any, so keep calm. And, later on, start your system again to see whether the issue fixed or not.
Also Read: How to Fix 500 Internal Server Error Problem
Way 3: Run the DISM Scan
After performing the SFC scan, still, Windows 10 update failed 0x80073712 and result in this error code. Then, try to run a DISM scan, this will possibly help you out. DISM, Deployment Image & Servicing Management, is the other tool that helps you to fix the Windows update errors. So, string with the below mentioned steps to run the DISM scan!
Step 1:- In the search box of your Windows, type cmd and then choose the best match i.e., Command Prompt.
Step 2:- After this, right-click on the Command Prompt and then click on the Run as Administrator.

Step 3:- Now, when Command Prompt Window will open then type DISM.exe /Online /Cleanup-image /Restorehealth this command and hit enter.
Now, you need to wait for some time unless the entire process finishes up.
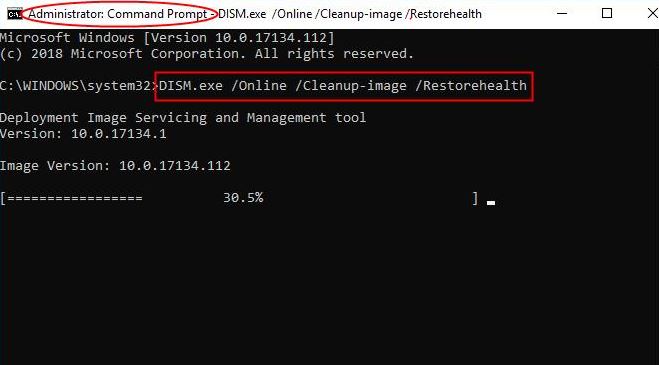
Step 4:- Lastly, start your computer again and perform the SFC scan (see Way 2) to repair the corrupt files.
After executing this, see the issue is solved or not. If the error code 0x80073712 still remains the same. Then, try our next fixes which are mentioned below.
Also Read: How to Fix Windows Defender Error Code 0x8e5e021f
Way 4: Eradicate Pending XML Files
Are you running into the Window 10 update failed 0x80073712 error code? Then, try to eradicate all the pending .XML files and try to restart the Windows Update. Below are the steps that you need to perform!
Step 1:- Launch Command Prompt as Administrator.
Step 2:- Then, type the under-mentioned command and press enter from your Keyboard.
net stop trustedinstaller
cd %windir%\winsxs
takeown /f pending.xml /a
cacls pending.xml /e /g everyone:f
del pending.xml
At last, start your system again and perform the Windows Update process once more. And, check if the error code 0x80073712 is solved or not.
Bonus Tip:- After entering the command and pressing the enter key, if you get the following (“The Windows Modules Installer service is not started”) message, then ignore it and proceed further.
Also Read: How to Fix Windows Error Code 1 in Windows [Solved]
Way 5: Start Windows Update Service Again
Last but not least, another way to fix the error code 0x80073712 issue is – to start the windows update service again. To start the Windows Update service again, follow the below-mentioned steps.
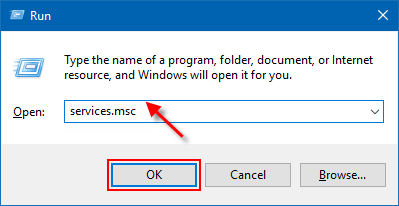
Step 1:- Open-up the Run dialog box by pressing the Win or R key simultaneously.
Step 2:- Then, type services.msc and click on the Ok option.
Step 3:- Now, scroll up or down and locate Windows Update, then right-click on it and select Stop.
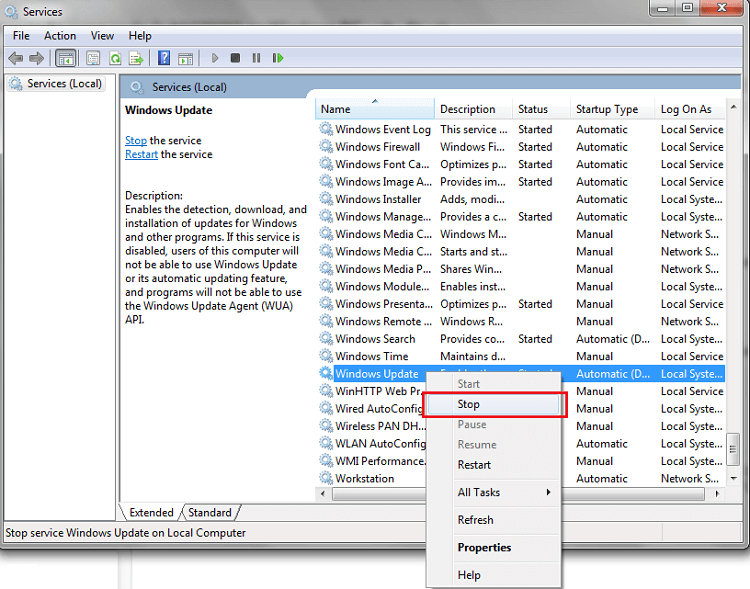
Step 4:- After this, to restart it, again right-click on it and select Start.
Now, perform Windows Update again and see the error code 0x80073712 issue has fixed or not.
Windows Update Error Code 0x80073712 [Fixed]
If you are running into the Windows 10 Update error code 0x80073712, then try out the above-mentioned ways in order to fix the issue. You do not need to try all the ways, just go through every one of the bit and choose the best one. Luckily, the error code 0x80073712 will not remain an issue anymore.
Lastly, if you are satisfied with our write-ups, then do subscribe to our Newsletter to stay in touch with every tech update. And, share your feedback with us through the comment box below. That’s all! We will see you soon, till the next meet, stay tuned with us!


