![[Fixed]-Video-Scheduler-Internal-Error-on-Windows-10 [Fixed]-Video-Scheduler-Internal-Error-on-Windows-10](https://wpcontent.freedriverupdater.com/freedriverupdater/wp-content/uploads/2021/01/04191225/Fixed-Video-Scheduler-Internal-Error-on-Windows-10.jpg)
Video scheduler internal error, the Blue Screen of death, is a common issue that you can seamlessly end up facing on different versions of Windows OS. This error can occur due to faulty graphic cards, some changes in the hardware/software etc. results in freezing issues with a stop error code. However, there are some solutions that you must seek when this error starts troubling you. This section has collected the best methods to fix video scheduler internal error Windows 10.
Methods to Fix Windows 10 Video Scheduler Internal Error
Corrupt file system and Windows registry, outdated drivers, malware etc. are the major reasons that cause video scheduler internal error on your Windows 10. Check out these effective ways to resolve your issue.
1. Fix Your Registry
If you are struggling with the video scheduler internal error on your Windows 10 computer, perhaps it is time to pay attention to the registry. Repairing the registry on your Windows is one of the most effective ways to resolve the video scheduler internal error.
Here are the steps to resolve this issue by repairing your registry:
- First things first, hit the Start button on your Windows PC and type cmd.
- Now, choose the Run as Administrator option.
- Type sfc/scannow and hit Enter after that.
You have to wait while your system runs the scanning process. Once the scan is complete, you can restart your computer and see if the video scheduler error is gone.
Also Read: How to Fix Video Driver Crashed and Was Reset
2. Update Your Video Drivers
One of the major reasons that could possibly trigger the video scheduler error on a Windows computer is a faulty or outdated driver. If you are facing this issue then it is time to look into drivers and update them.
In order to update video drivers on your Windows computer, follow these steps:
- Press Windows+R keys on your keyboard in order to type devmgmt.msc and hit the Enter button.
- Then, you have to visit the Display Adapters department and view its components.

Source: Windowsreport - After that, you need to right-click on your video card and choose the Update Driver option.
Now you can follow the instructions that you have on your screen and complete the update. Once it is done, you can reboot your computer and finish the installation. You can also visit the manufacturer’s official website and look for the compatible driver to download.
If you do not want to follow the time-consuming procedure of downloading and installing the video drivers using this method then you can use the Bit Driver Updater tool that will effectively scan and fix the driver issues and you will be able to fetch the right drivers. Besides that, this software is pretty quick and feature-rich to take care of all the drivers present on your system.
Here’s what you have to do:
- You need to download and install the Bit Driver Updater tool on your computer.

- Open the tool and click the Scan button. Now, the program will scan and find the faulty drivers.
- Let the tool update the drivers on your computer.
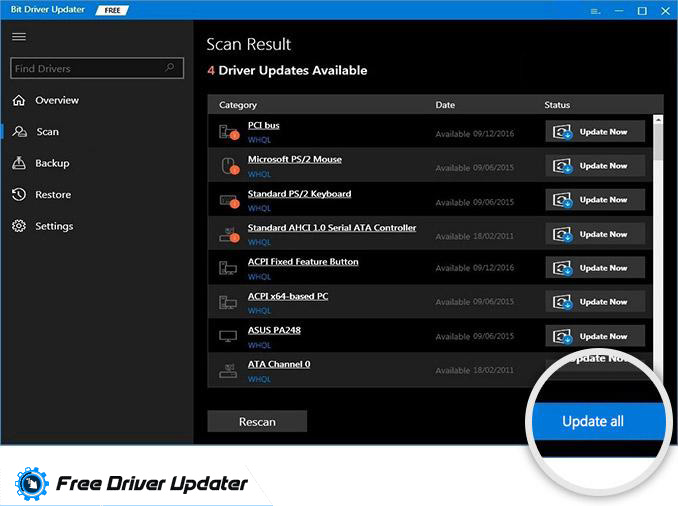
- After the drivers are updated, reboot your system.
Also Read: Driver Power State Failure on Windows 10: Solved
3. Run a Full System Scan
If you haven’t checked up on the malware factor on your Windows system for a long time, then you should do it right away and try to help this issue out. There are chances that the malicious components have hit the system and caused the video scheduler internal error. To see if that is what is pushing operations to annoy you, you can use Windows Defender and run a full system scan on your Windows computer.
Here is what you have to do to run a full system scan on your computer and resolve the issue:
- First, you have to navigate yourself to the taskbar and hit the Search bar.
- After that, type Windows Defender there and then launch the Windows Defender Security Center by double-clicking on it from the search results.
- Now that you have opened the Windows Defender Security Center, you have to move to the menu on the left of your screen and then click on Virus & Threat Protection.
- Click on the Run a New Advanced Scan link and choose the Full Scan option on the Advanced Scan window.
- Finally, you have to hit the Scan Now option.
Hopefully, you will show the malware way out and let your system breathe freedom. This method should be your solution but if it doesn’t help, you can use a trustworthy antimalware to help you detect threats on your Windows computer and fix any issues that are bothering you including the video scheduler internal error. In case you do not want to count on a third-party software or this method fails to fix the problem then you can try other solutions on the list.
Also Read: How to Fix Windows Defender Error Code 0x8e5e021f
4. Update Windows Operating System
Another best way to fix the video scheduler internal error on your Windows computer is to upgrade your system. To try this method is to look for the faulty system patches on the system that can cause the video scheduler internal error. You can fix this error by upgrading the system patches and free your system from this issue.
In order to upgrade your Windows system, follow these steps:
- You have to press the Windows + I keys in order to visit the Settings app.
- Now, choose the Update & Security option.
- You have to click on the Check for Updates option on the right pane.
After the updates are downloaded on your system, you can restart your computer to have them installed and complete the process. Once the process is complete, you can see if the video scheduler internal error has been resolved.
Also Read: Fix 500 Internal Server Error on Windows PC
5. Uninstall Recently Installed Software or Hardware
The video scheduler internal error can also occur due to the hardware or software that you have installed on your computer recently. In order to fix this problem, you can consider eliminating them from your system and check if it works.
In order to uninstall the recently added software or hardware from your computer, you need to follow these steps:
- Click on the search icon to type Apps & Features and hit the Enter button.
- Now, hit the Instal Date option from the drop-down menu next to the Sort By section.
- There, you can find the software you have recently added on your system and then click on it.
- Hit the Uninstall button.
Apart from that you can remove the recently added hardware from your computer to fix the issue. After that, you need to reboot your computer and see if your problem has been solved.
Also Read: How to Fix Faulty Hardware Corrupted Page on Windows 10,8,7
Conclusion
You just learned the best methods to fix the video scheduler internal error on Windows 10 PC and one of them will certainly get you rid of this problem. If you have more to add, feel free to shoot it in the comment section.


