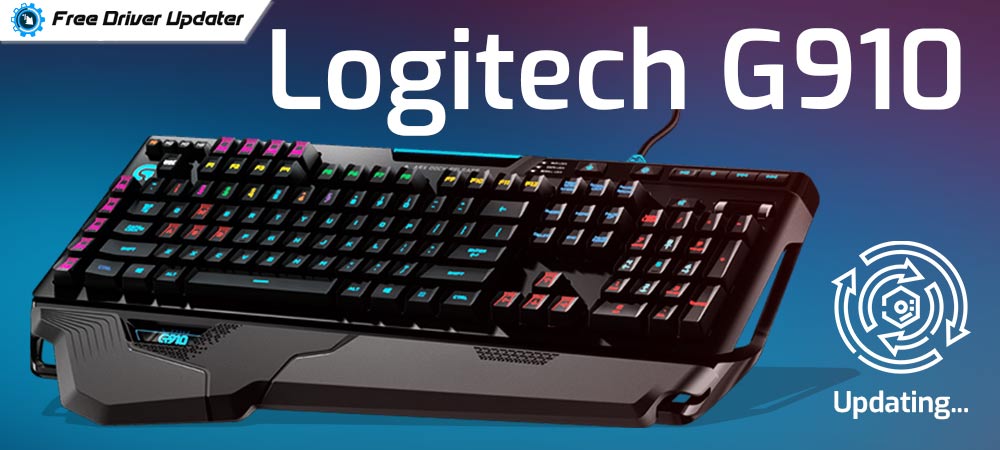
A precise and easy tutorial to guide you on how to download and install Logitech G910 software for Windows 10, 8, 7 PC. Read the entire article for further information.
Running into Logitech G910 not working issue? Well, we can understand how painful or annoying it is, when your preferred Logitech G910 mechanical gaming keyboard becomes completely unresponsive. But, don’t worry, this inconvenience can be fixed, easily & quickly, just by downloading and installing the most suitable Logitech gaming software.
This software runs in the background to supply intelligence and power to your Logitech gaming device. Through this software, one can customize their device, apply multi-key commands, turn on advanced gaming features, and many more.
Therefore, to enjoy the best-ever performance of your Logitech G910 you should download and install the Logitech G910 gaming software. Don’t panic, if you aren’t aware of how to do so. This downloading guide will help you out.
How to Download, Install, and Update Logitech G910 Software for Windows 10, 8, 7
Below are the easiest methods to download and install Logitech G910 software for Windows PC.
Method 1: Download and Install Logitech G HUB Software
For ensuring the proper functioning of the Logitech G910 gaming keyboard, the user needs to download Logitech G HUB software on their PC. It is a software platform that helps users customize their keyboards. Anyways, the software installs automatically when the user connects the keyboard to the system. But, if in case you are experiencing issues with the automatic installation, then, follow the steps shared below to install the software manually from the official website.
Step 1: Click here to visit the official website of Logitech.
Step 2: Then, input G910 inside the search box. Alternatively, you can also type the serial number of the hardware.

Step 3: After this, make a click on the G910 picture.

Step 4: From the next window, look for the Support option and click on it.

Step 5: Now, click on the Downloads button from the left pane and then click Download Now to start the downloading process.
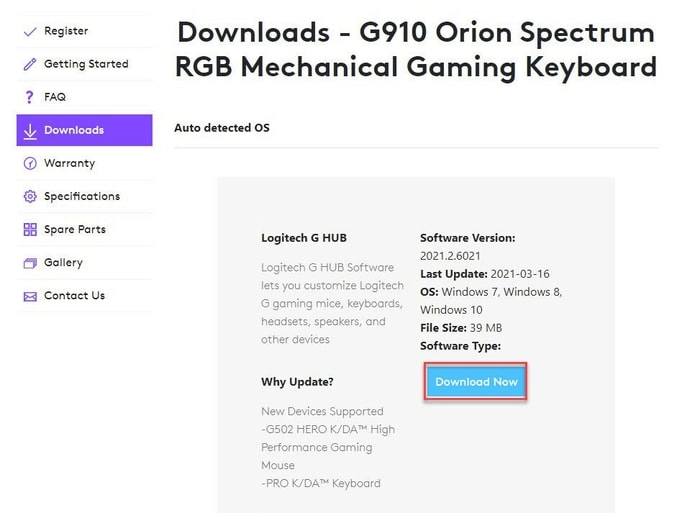
Step 6: Once done, then double-click the downloaded file and a new window will prompt asking you to start your PC again before installing the software. For this, click on the Reboot Now option.
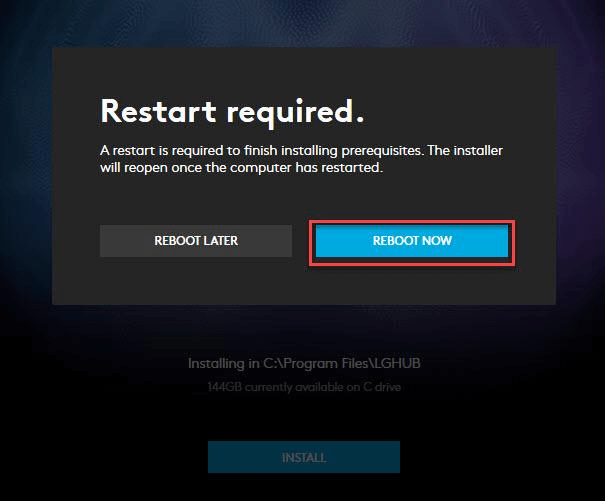
Step 7: The installer will start automatically once the PC restarted. Lastly, click on the Install option.

Now, you are ready to use your Logitech G910 gaming keyboard. With this software, you can unlock the full potential of your keyboard.
Also Read: Logitech G HUB Not Loading on Windows 10, 8, 7 [FIXED]
Method 2: Download and Update Logitech G910 Drivers/ Software
Logitech G910 abruptly stops functioning fine when its respective keyboard drivers goes missing or out of date. Along with installing the software, you should also make sure to keep its drivers always up-to-date in order to maintain its consistency.
There are two ways to download and update the Logitech G910 drivers i.e, manually or automatically. We have explained both the methods below, let’s read them!
Way 1: Use Device Manager to Update Logitech G910 Drivers Manually
Device Manager is a Windows in-built utility tool that lets you check and change the driver status. But, to use this tool you must have good technical knowledge, especially about the drivers. If you fit the bill, then perform the on-screen instructions to update drivers in Device Manager:
Step 1: On your keyboard, press Windows logo + X keys at the same time.
Step 2: Then, click on the Device Manager from the prompted list.
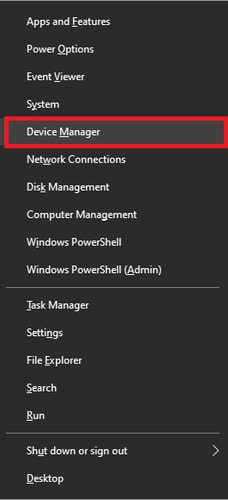
Step 3: Now, in Device Manager, double click the Keyboards to expand its category.
Step 4: Next, click right on your Logitech G910 keyboard device.
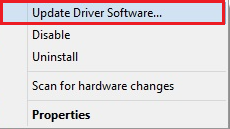
Step 5: After this, choose Update Driver Software from the context menu list.
Step 6: From the subsequent window, choose the option that says Search Automatically for Updated Driver Software.
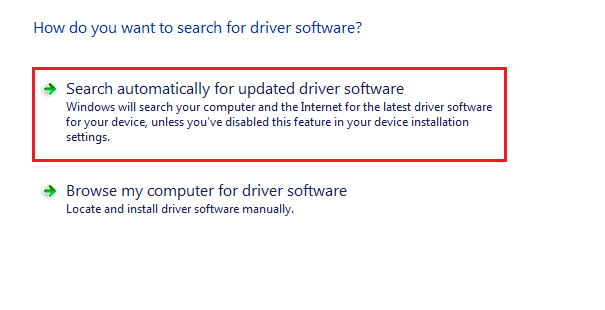
Step 7: And, if in case, the automatic scanning doesn’t start, then go with another option saying Browse my Computer for Driver Software. Then, click on the Let me pick from a list of available drivers on my computer.
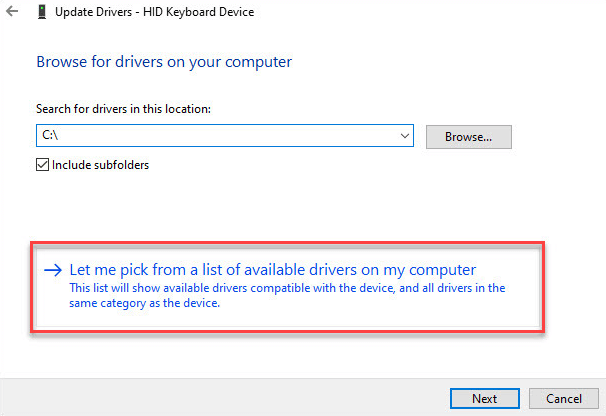
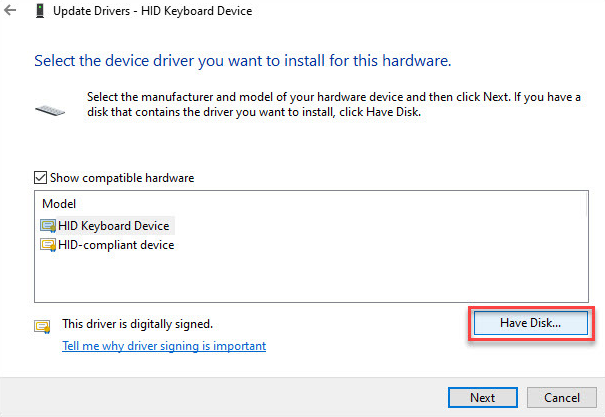
Step 8: Make a click on the Have Disk option.
Step 9: Next, click on the Browse button. And, then locate the driver file you have downloaded, choose it and make a click on Open.
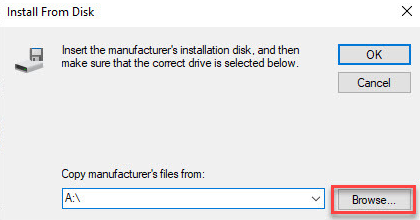
Step 10: Lastly, start the installation by clicking on the OK button.
Once done, then check to see if the Logitech G910 keyboard not working has disappeared.
Also Read: How to Download and Update Logitech Driving Force GT Driver for Windows 10, 8, 7
Way 2: Automatically Get Latest Logitech G910 Drivers via Bit Driver Updater (Recommended)
Don’t have enough time as well as technical knowledge to get the correct drivers manually? If yes, not to worry, you can do it automatically with Bit Driver Updater.
Bit Driver Updater is the best and safest way to update drivers within just a few clicks of the mouse. The software automatically recognizes your machine and finds the most genuine drivers for you. Bit Driver Updater only installs the WHQL certified and signed drivers. All you need to do is just follow the instructions shared below:
Step 1: Download Bit Driver Updater from the button below.
Step 2: Then, run the installer file and follow the on-screen instructions to finish the installation.
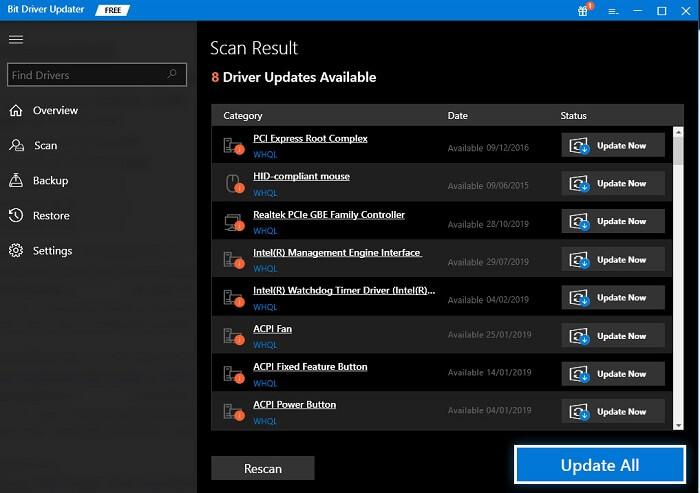
Step 3: Once Bit Driver Updater is successfully installed on your computer, then launch it and wait until the driver updater utility scans your PC for faulty, broken, or outdated drivers.
Step 4: Check the scan results.
Step 5: And, click on the Update Now button presented next to the Logitech G910.
Step 6: If you noticed that other drivers also need to be updated, then you can also click on the Update All button instead.
Bit Driver Updater comes in two models i.e., free or pro version. If you want to unlock the complete potential of the utility, then you have to use the pro version of the software. Otherwise, you can update drivers manually, one by one, with the free version.
In addition to this, you also get a 60-days money-back guarantee and 24/7 technical support. And, if you are facing any Windows-related issues like BSOD (Blue Screen of Death) errors, slower PC performance, lack of security patches, or whatnot, then you can also seek help from Bit Driver Updater. The most exciting thing is that the software comes with the in-built backup & restore tool that automatically creates the backup of existing drivers before changing them, so the drivers can be restored if needed.
Logitech G910 Software Download, Install, and Update: DONE
To sum up, we hope the above-provided information helps you make your Logitech G910 gaming keyboard work again. In this write-up, we have tried to teach you how to download and install Logitech G910 software hassle-free.
Was this downloading guide helpful? Please, let us know in the comments below. Also, if you have any doubts or suggestions, then do tell us that too in the comments section. In the meantime, do subscribe to our Newsletter for more troubleshooting as well as downloading guides. Additionally, follow us on Facebook, Twitter, Instagram, and Pinterest for quicker updates.


