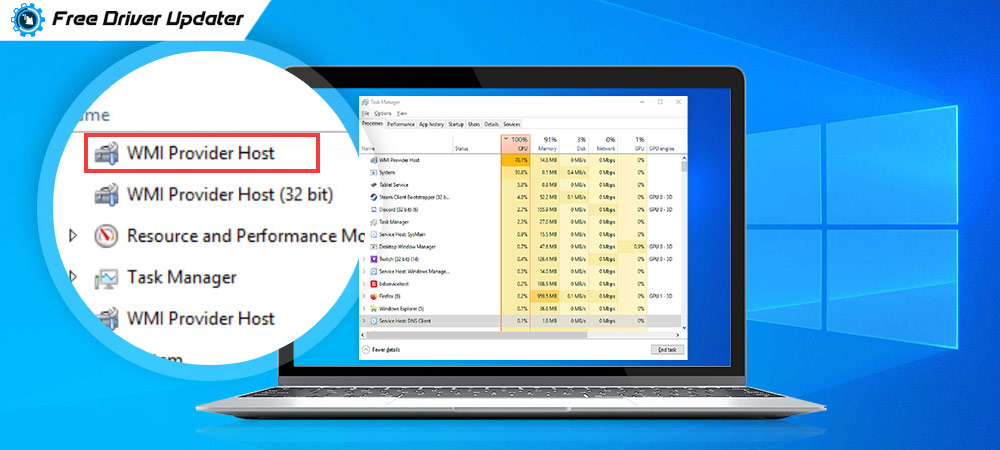
If you are noticing WMI Provider Host high CPU usage in the Task Manager window of your computer, then it might concern you a bit as you would be wondering why you are facing this problem?
Any program or service which hogs the CPU and system resources would automatically lead to a slow performing PC. If you are unable to comprehend what is WmiPrvSe.exe WMI Provider Host and why it is consuming the CPU to such an extent, then this tutorial will help you understand more about it in detail. Apart from this, we will also tell you the solutions that will resolve the issue.
What is WMI Provider Host?
WmiPrvSe.exe WMI Provider Host is the abbreviation of Windows Management Instrumentation Provider Service. It is usually used by developers for the purpose of monitoring and is an important service which powers several apps.
Basically applications can’t operate without the WMI Provider Host. If the WMI Provider Host process stops working, then a lot of system features won’t function properly. Additionally, users will also not get error notifications if the WMI Provider Host is not running in their system.
Therefore, if you want to know how to stop the WMI Provider Host high on CPU Windows 10 problem, then discover the methods ahead in the article.
Also Know: How to Fix Sedlauncher.exe High Disk CPU Usage on Windows 10
Resolve WmiPrvSe.exe WMI Provider Host High CPU Usage Problem:
There could be a number of ways in which the WMI Provider Host high CPU problem can be sorted and solved. We will look at them one-by-one.
Solution 1. Troubleshoot in Safe Mode
You can troubleshoot the problem of WMI Provider Host high CPU consumption by booting into Safe Mode with networking. This will help you identify the bad services, processes or programs leading to the aforementioned problem of high CPU usage by the WMI Provider Host.
Step 1. You need to go to the System Configuration by typing msconfig in the Run dialog box and pressing Enter.
Step 2. Navigate to the tab called Boot in the System Configuration window and check the box of Safe boot.
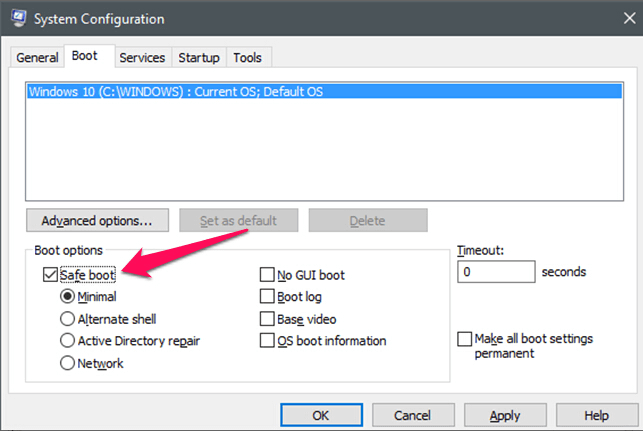
Step 3. You can then choose the Network option, click Apply and then OK.
Step 4. Finally, click the Restart button to get into Safe Mode.
Step 5. In Safe Mode, launch the Windows PowerShell as an administrator.
Step 6. Input the following command and hit the Enter key: msdt.exe-id MaintenanceDiagnostic
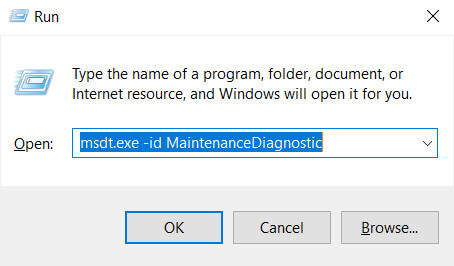
Step 7. A new troubleshooting window will open up in which you will have to click Next to initiate troubleshooting.
Step 8. You can follow the on-screen instructions in a similar manner and if the troubleshooter detects any error, then it will fix it.
Step 9. Now write the following command in the PowerShell window followed by pressing the Enter key: msdt.exe /id PerformanceDiagnostic
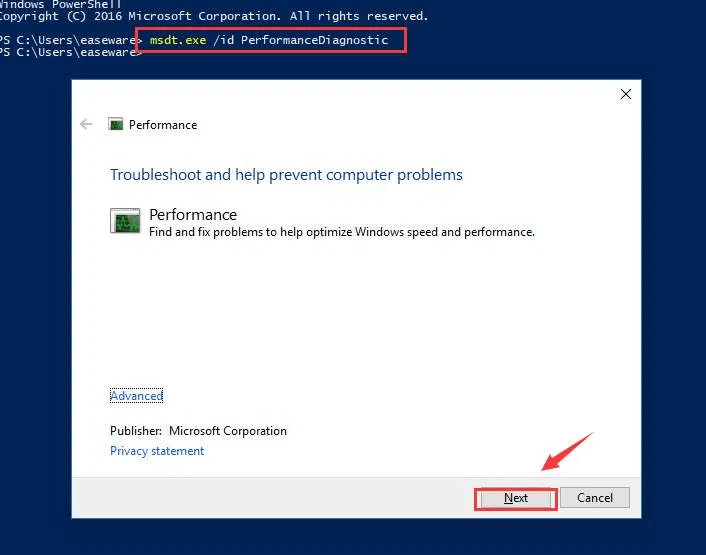
Image: how2fixerror
Step 10. This will open up the Performance troubleshooting window in which you have to proceed by clicking Next and follow other appearing instructions on the screen just as you have done in the prior step.
Also Read: How to Fix Windows Modules Installer Worker High CPU in Windows 10
Step 11. Finally, boot in normal mode after the troubleshooting finishes.
Step 12. Go back to the System Configuration window and uncheck the Safe boot box in the Boot tab. 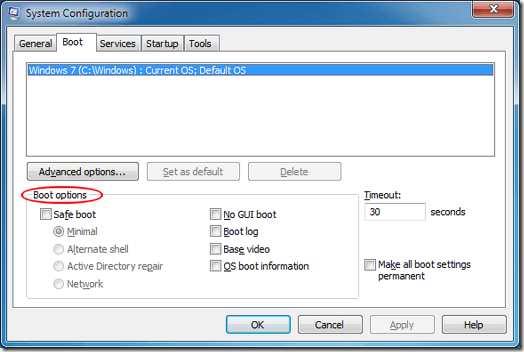
Step 13. Then, click Apply and OK to save the changes and exit.
Step 14. Next, restart your Windows system in nomal mode.
In this way, you can troubleshoot the problem of WMI Provider Host high CPU consumption on your PC.
Solution 2. Uninstall Faulty Components and Hardware and Reinstall them
If the device components and hardware drivers are corrupted or damaged, then there is a possibility that the WMI Provider Host high CPU usage problem can occur.
To stop this problem you can uninstall those faulty drivers and components and more importantly you can download or update the latest driver updates after uninstalling them, to have a fully functioning computer.
Read More: How to Fix Faulty Hardware Corrupted Page on Windows 10,8,7 [Solved]
Identify Faulty Components With Event Viewer & Task Manager
Step 1. Tap Windows and X keys together and select the option of Event Viewer.
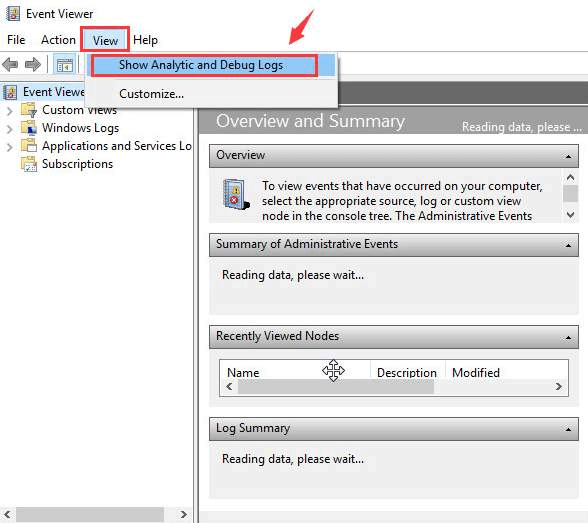
Step 2. As the Event Viewer window pops open your computer screen, you will have to click on the View button located in the menu bar.
Step 3. Further, choose the option of Show Analytic and Debug Logs from the context menu.
Step 4. On the Windows left side pane, you can click the Applications and Service Logs first. Then, go to Microsoft, further go to Windows, then navigate to WMI Activity, and finally to Operational log.
Step 5. Choose the latest Error items visible on the items list.
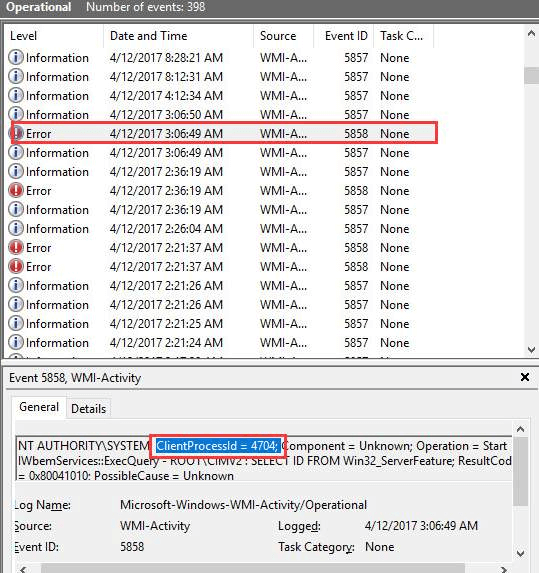
Image: Driver Easy
Step 6. Simultaneously, open the Task Manager on your computer and navigate to the Details tab.
Step 7. Then, you will have to locate and identify the processes from the PID column (in the Details tab) of the Task Manager.
You can do this by identifying them from the PID (Process ID) which is the same as the ClientProcessID value in the Event Viewer window.
Bonus Tip: Know about Best Free Driver Updater Software For Windows 10, 8, 7
Uninstall Faulty Components and Drivers:
Step 1. Finally, you can visit the Programs & Features segment of the Control Panel.
Step 2. Here, you can uninstall the defective programs.
After uninstalling the concerning programs and apps, you can install the newest drivers again to resolve the WMI Provider Host high CPU consumption error on your Windows 10 computer.
Reinstall and Update the Drivers Automatically:
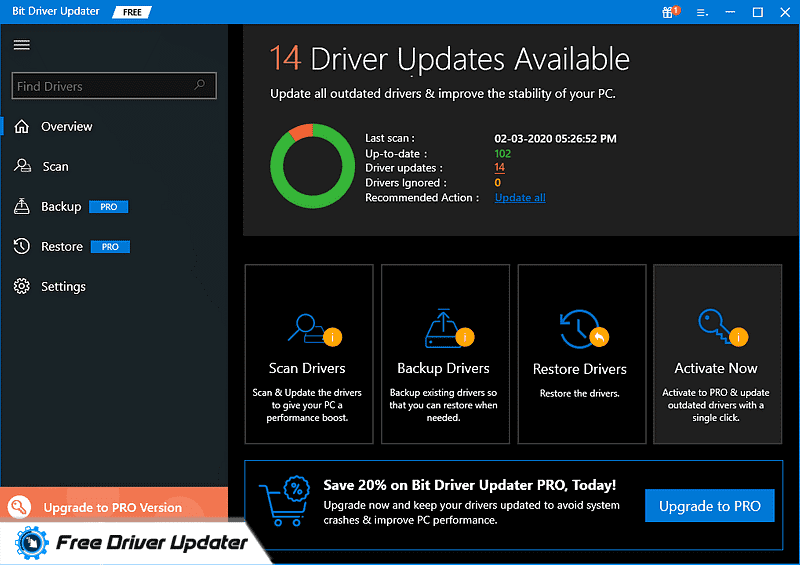
After removing the faulty drivers and components, you will need to install and update them. You can do this manually from the PC manufacturer’s website or else use an automatic tool such as the Bit Driver Updater.
With this tool, you can scan your computer and then download as well install the latest driver updates of the uninstalled or missing driver components on your PC easily and automatically.
Solution 3. Remove Malware
Take a dig at your Windows computer to detect the presence of any malicious codes and programs in the system with your antivirus solution. Sometimes, the presence of malware can be the cause behind the WMI Provider Host high CPU usage problem.
Thus, the problem can be solved by scanning your computer and removing any hidden malware.
Resolved: WMI Provider Host High on CPU Windows 10
So, here we are at the concluding point of this article on WmiPrvSe.exe WMI Provider Host high CPU usage error and how to resolve this issue on Windows 10 computers.
If you have queries or suggestions, then leave them in the comment box below. You can also follow us on social media to find solutions to various problems that you may face in your day-to-day life while working on your computers.


